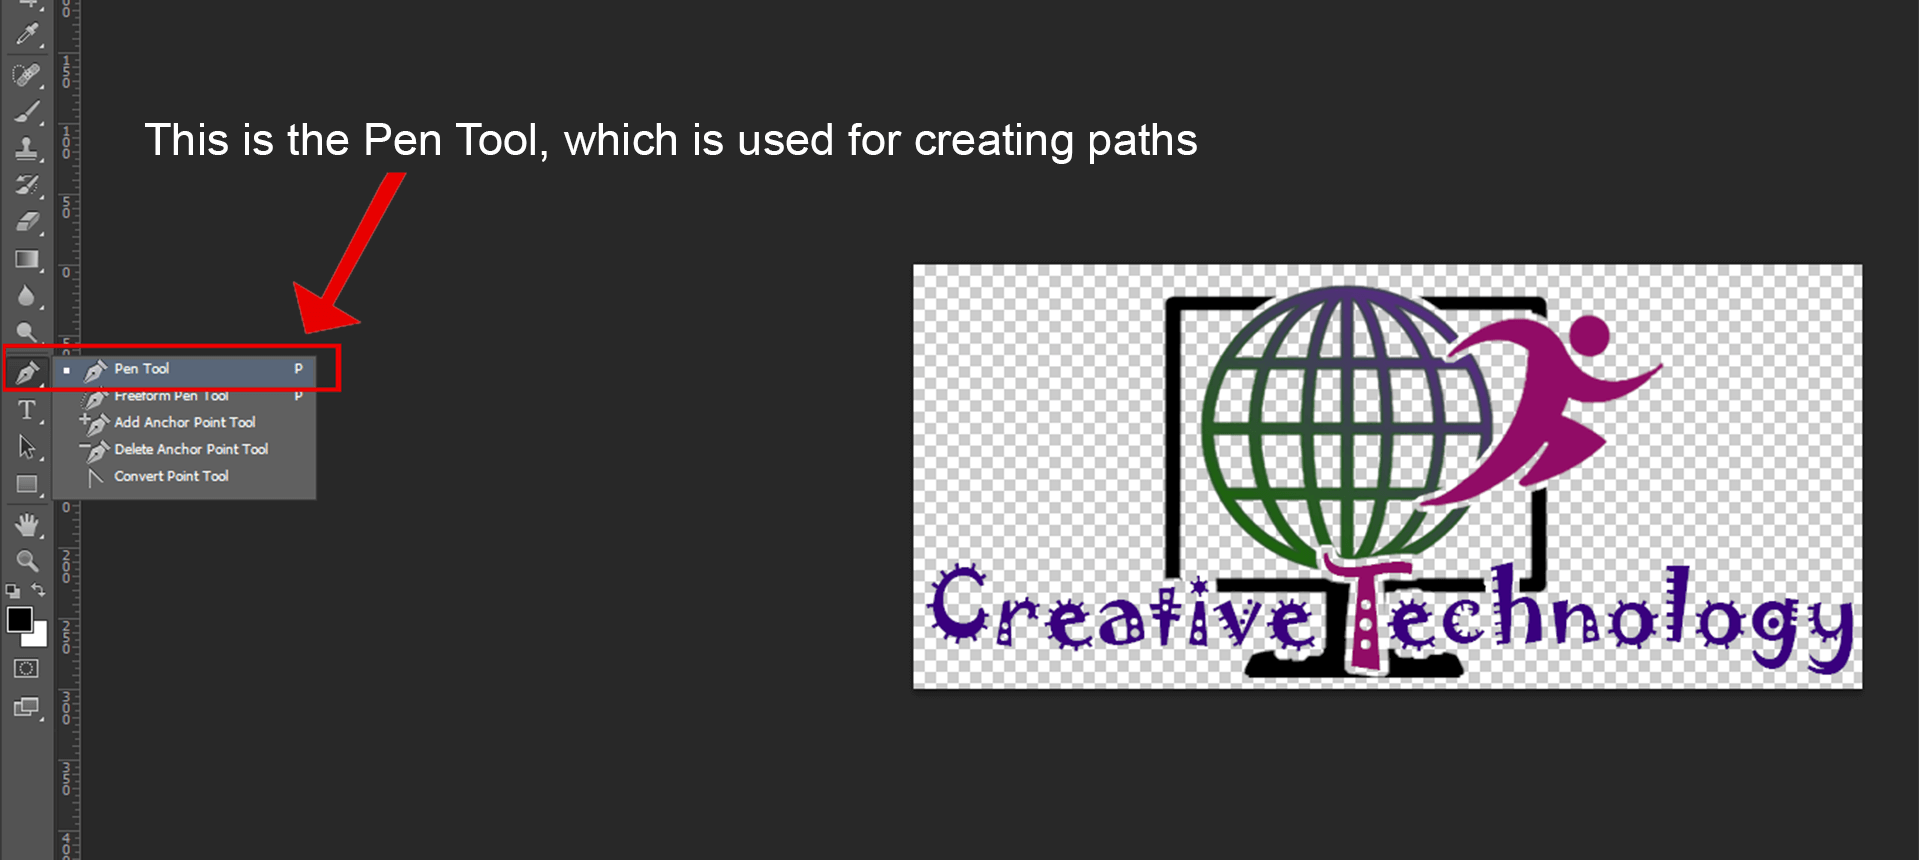
How to use the pen tool in photoshop to delete background?
What is the Pen Tool and why is it important?
It is essential to first understand the purpose of the Pen Tool. The Pen Tool is one of the most powerful and precise features in Adobe Photoshop, enabling users to accurately separate the background from any image. Only with the Pen Tool is it possible to make realistic and extraordinary edits for viewers. If you edit a photo correctly using the Pen Tool, it is impossible to tell that its background has been removed.
So far, no other tool can separate the background from an image as accurately as the Pen Tool. Therefore, every photographer, graphic designer, and even every website owner should know the technique of removing the background from an image.
In this guide, we’ll show designers how to use the Pen Tool in Photoshop to remove backgrounds with precision. Whether you’re working on product mockups, branding assets, or digital art, the Pen Tool offers unmatched control for creating clean, professional cutouts. Follow along as we walk through the step-by-step process to help you integrate this essential technique into your design workflow.
How does the Pen Tool work?
How to use the Pen Tool in Photoshop to delete the background?
This is a common question among those who are beginning to explore image editing with precision tools like the Pen Tool in Photoshop. While removing a background may seem like a straightforward task, achieving clean and professional results requires a solid understanding of how the Pen Tool works. The Pen Tool allows you to create precise paths around objects, giving you complete control over what parts of the image to keep and what to remove. Before diving into the process of deleting a background, it’s important to grasp the basic mechanics of the Pen Tool and how it can be used to define accurate selections around your subject.
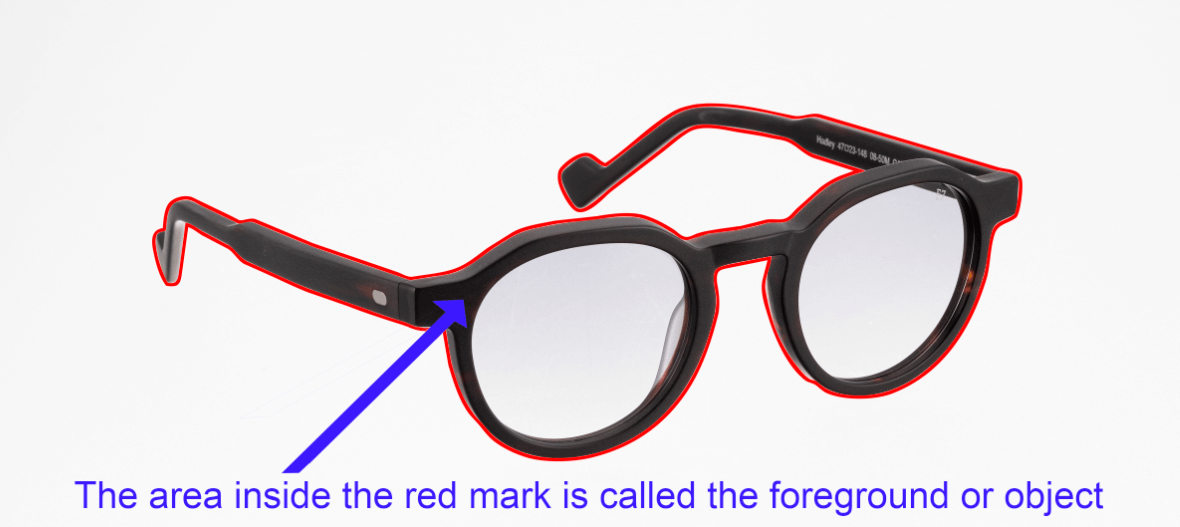
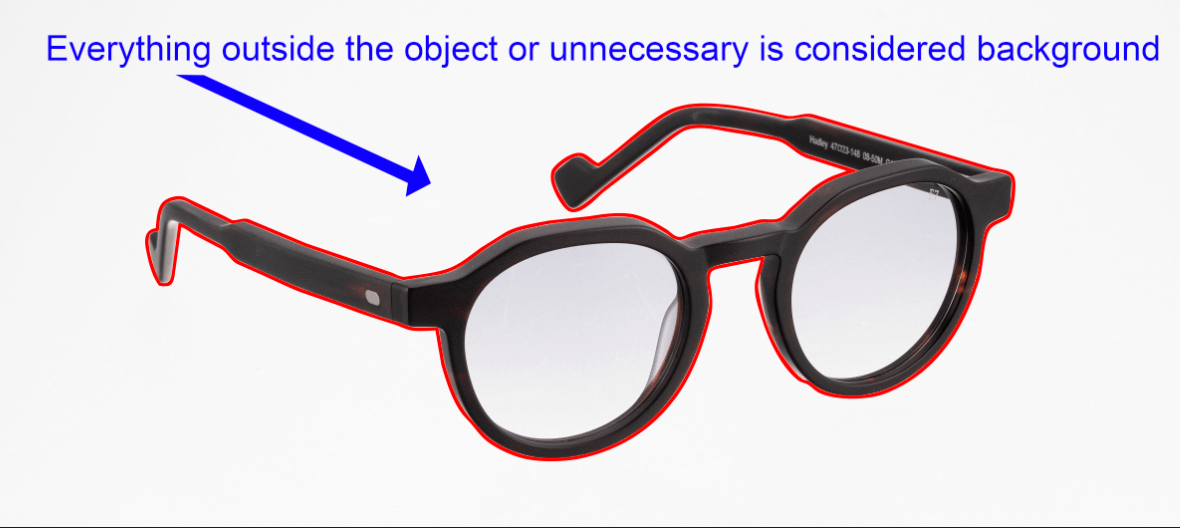
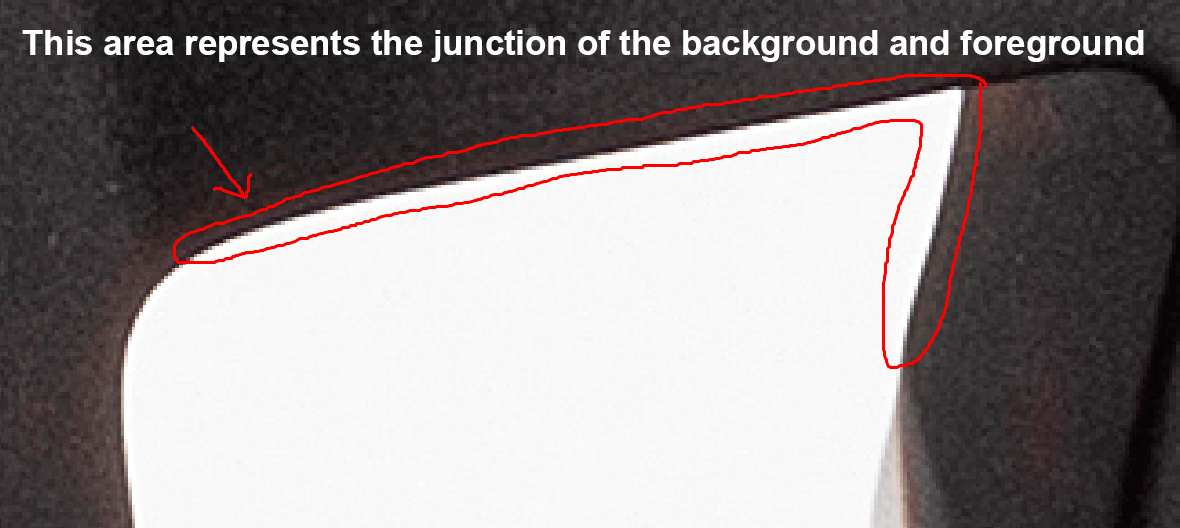
When the image is zoomed in and the junction between the foreground and background is closely examined, it becomes apparent that the boundary typically spans 2 to 3 pixels. The primary function of the Pen Tool is to draw a precise path along this boundary, commonly known as a clipping path. This path defines the separation between the foreground and background, which is later refined using Photoshop’s processing techniques. As such, the path created with the Pen Tool plays a critical role in ensuring an accurate and seamless background removal.
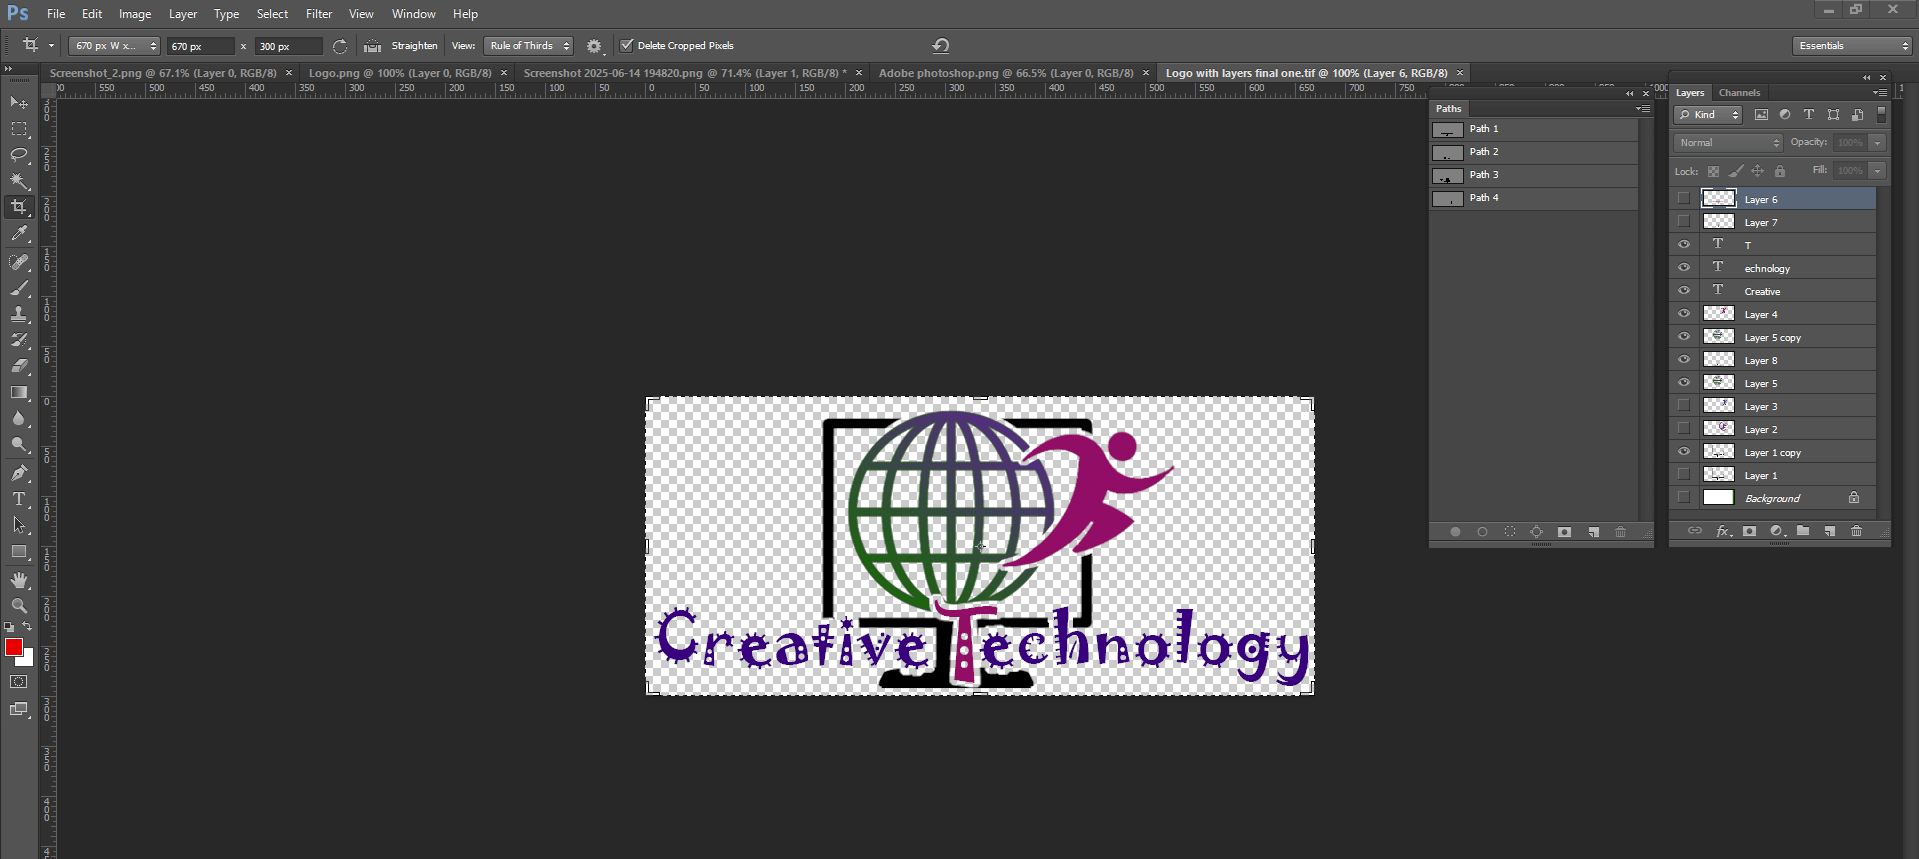
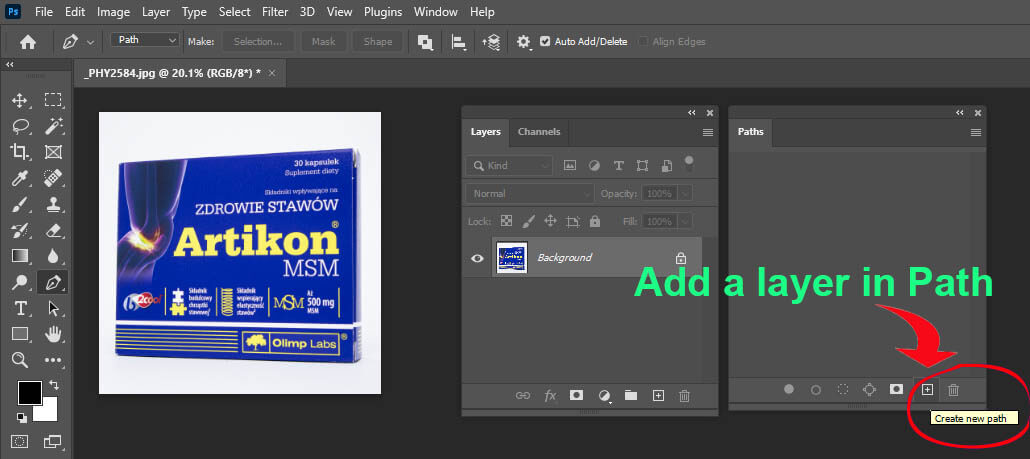
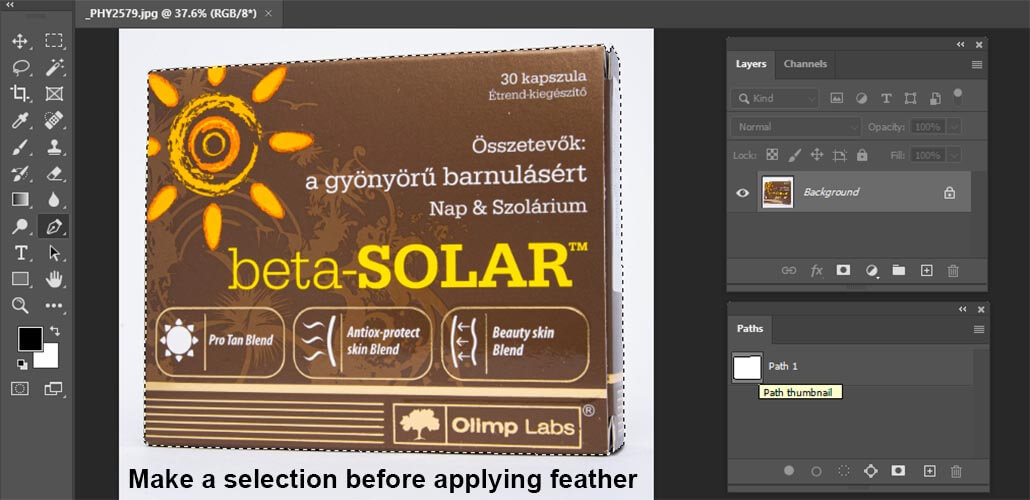
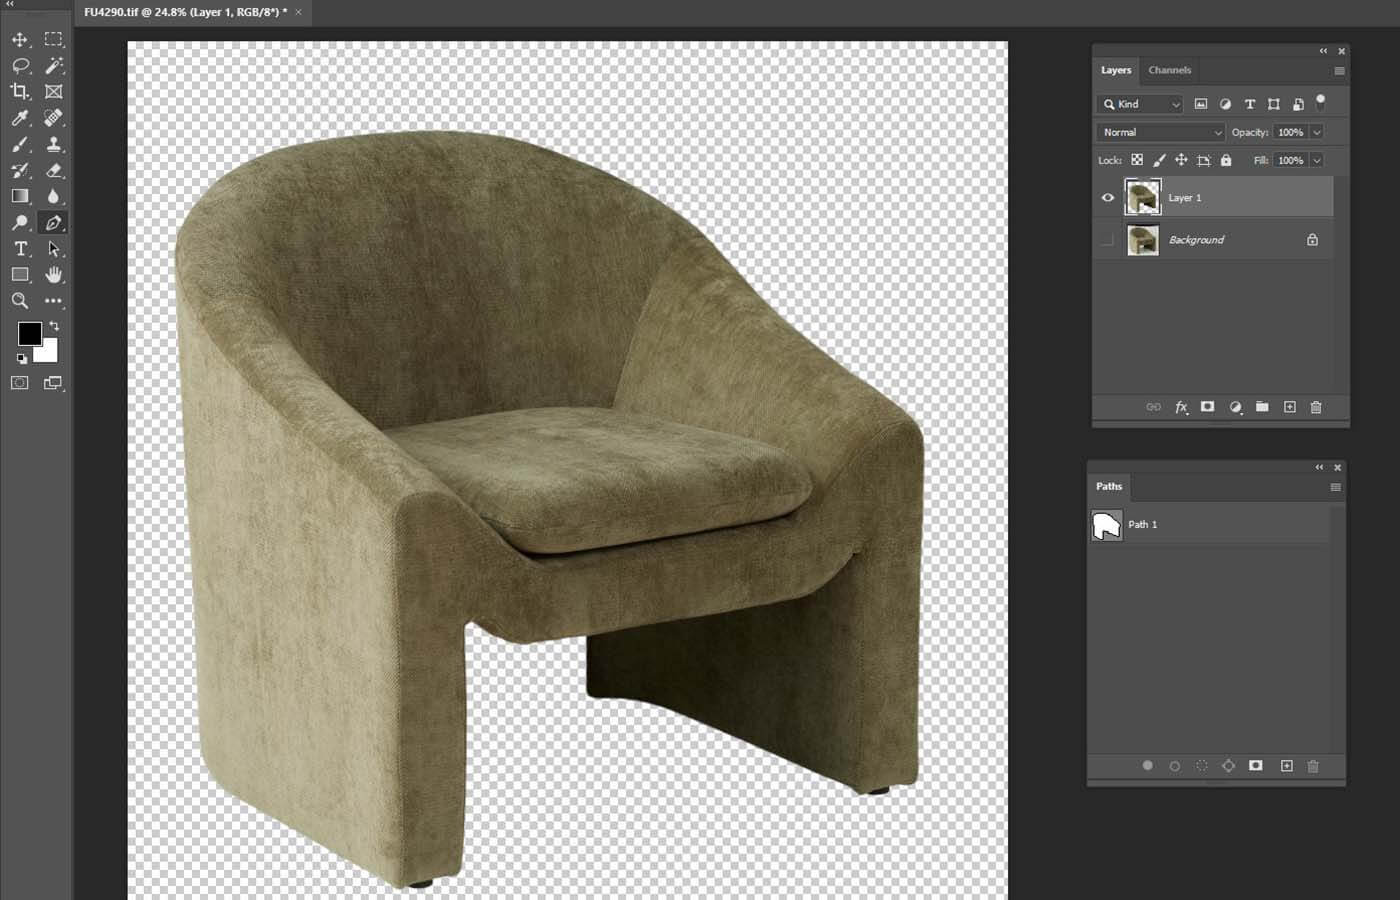
Prepare your image and the Pen Tool for creating a clipping path.
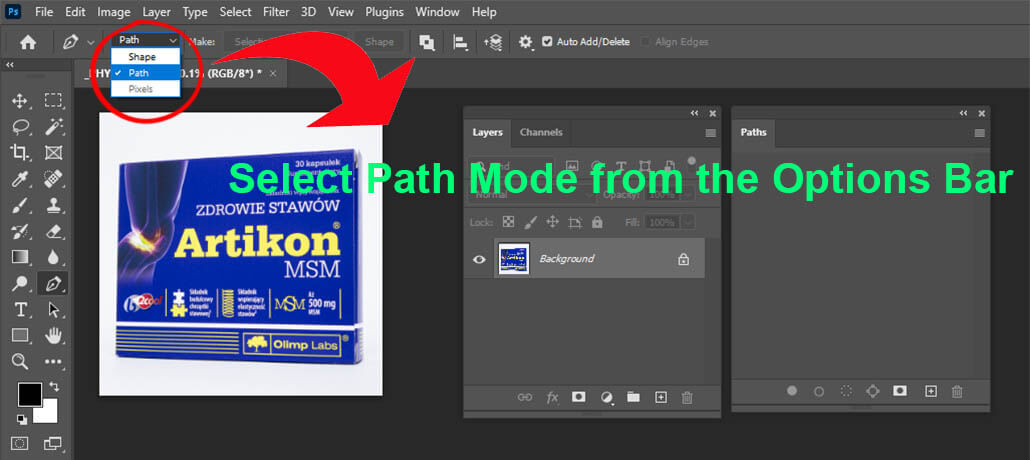
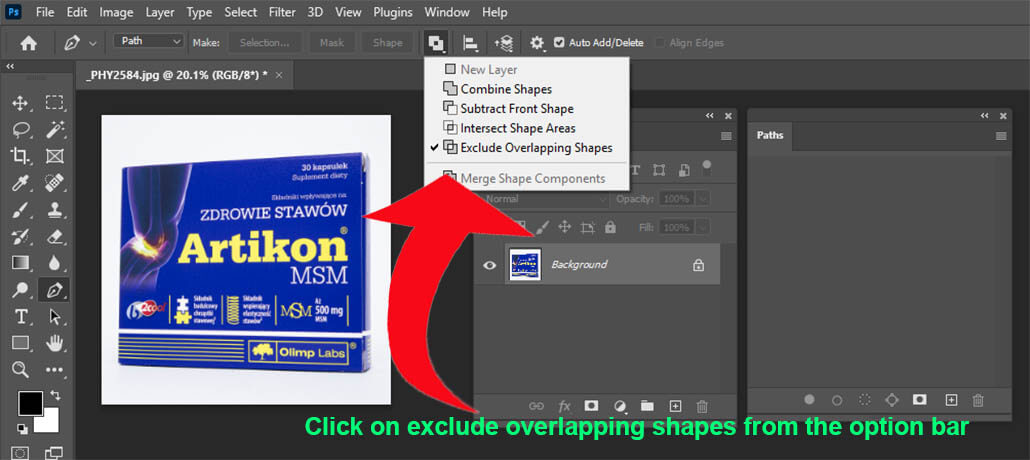
First, open the image in Photoshop. Then, on the Path layer, create a new path named “Path-1.” When you select the Pen Tool, the Pen Tool Options Bar will appear above. Before starting the clipping path operation, set the following options from the Options Bar:
Select Path Mode in Pick Tool Mode.
Select Exclude Overlapping Shape in Path Operation.
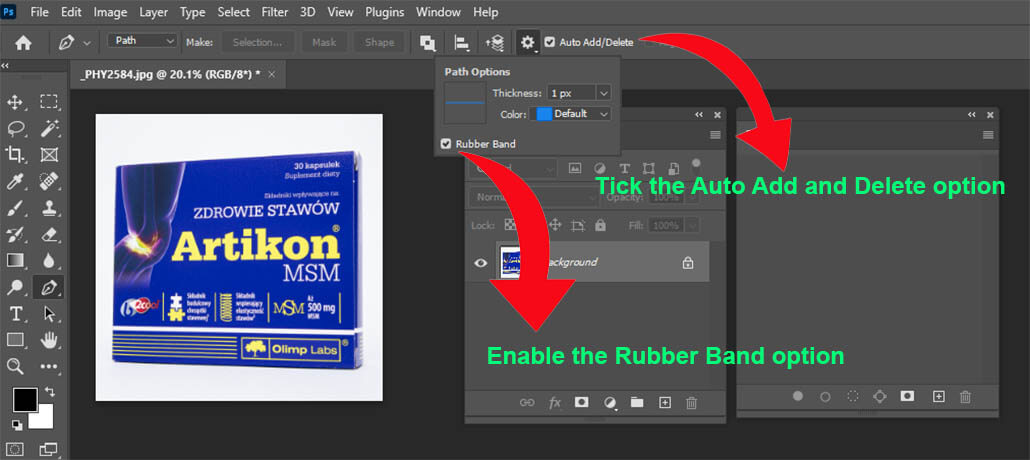
Check the Rubber Band option from the Gear button.
Check Auto Add & Delete.
After setting the above four options, your image is ready to begin the path.
Methods for Creating a Path Using the Pen Tool:
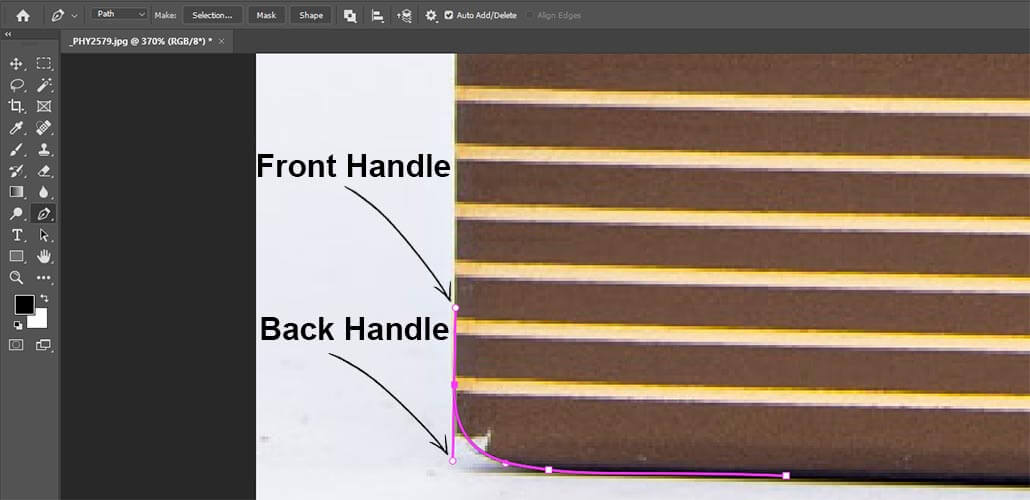
To create a clipping path for any element, first start by selecting any area of the foreground of the image as the path’s starting point. Now zoom in on the image, hold down the left mouse button, and place a point between the foreground and background. The point should be placed in such a way that the two handles—back and front—are visible.
Using the Pen Tool, place multiple points to draw a line that separates the entire foreground from the background. Each point will have two handles: the back handle indicates the direction the path came from, and the front handle shows the direction it will move next. It’s important to create each point with soft corners so that the path appears smooth and the points are not easily noticeable unless the path is selected.
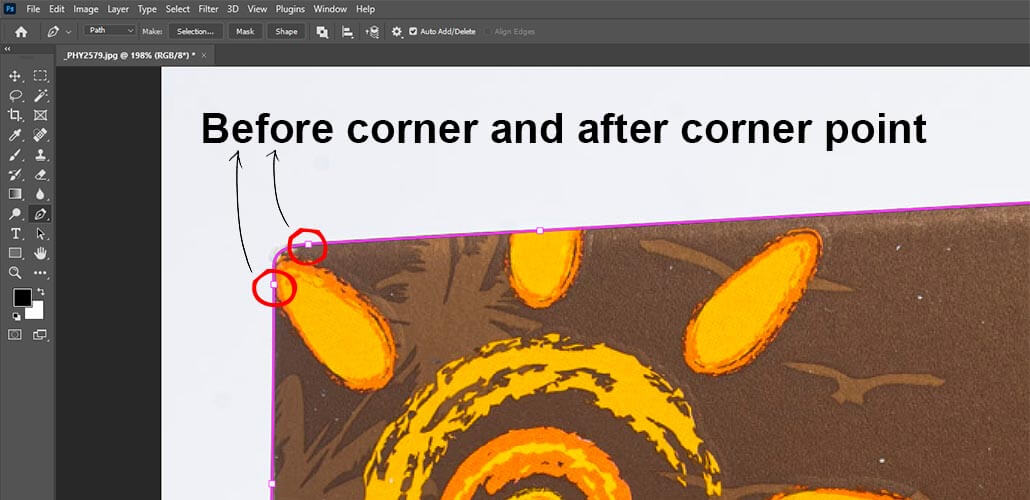
The path should outline the product’s foreground, creating a shape that is completely separate from the background. In this case, it should be kept in mind that the distance from one point to another should be set according to the editor’s convenience. Also, it should be noted that in the case of a corner area, there should not be a point exactly at the corner—only one point before the corner and one point after it. The closer you place a point before the corner, the closer you should place another point after the corner.
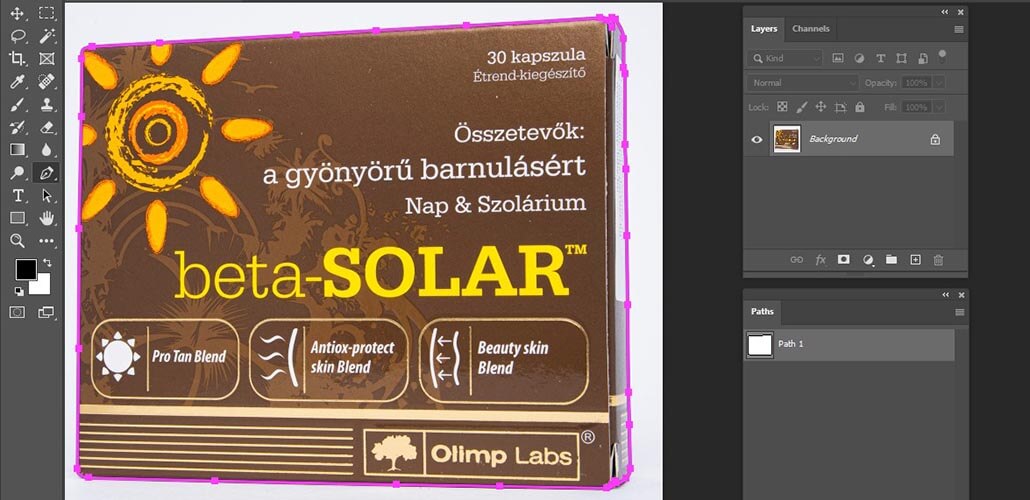
By keeping these principles in mind, you’ll be able to create high-quality, professional-looking clipping paths in entire product.
Check the Path and Make a Selection:
After completing the clipping path in the targeted image, you need to check the path to see if it is correct. That is, you need to see if the product has been cut off too much in any part or if any part of the background has been moved with the product.
If you find an error in any part, select the point or points that are incorrect with Ctrl + left mouse click and edit the path by moving the points up, down, left, or right using the arrow keys (←, →, ↑, ↓).
After checking the path, do the selection path by pressing Ctrl + Enter while the path is active.
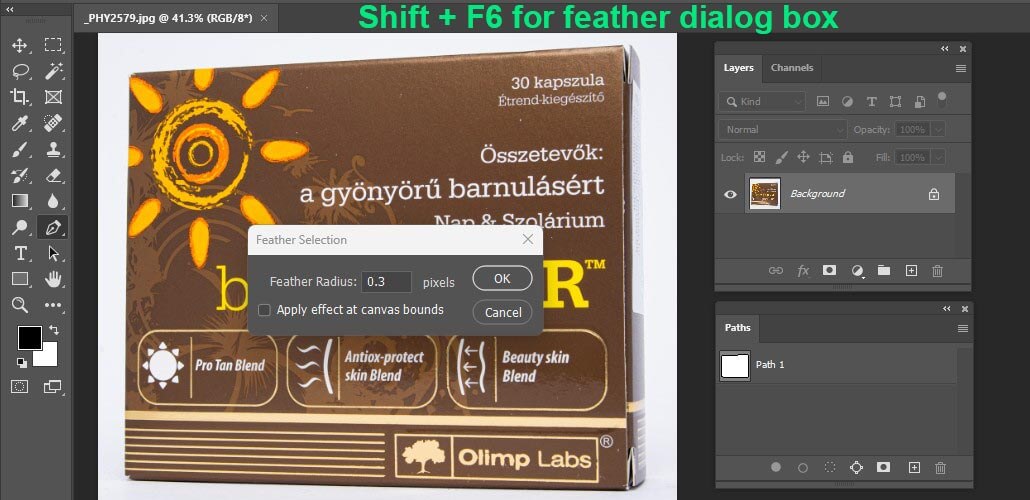
Feathering the image for a smooth adjustment with the background and foreground
Before we begin, it’s important to understand what feathering is and why we use it. When you zoom in and closely examine the edge where the background and foreground meet, you’ll notice that they blend smoothly over 2–3 pixels.
This smooth transition is what feathering creates. When removing a background, feathering allows the edges of the foreground to blend seamlessly with the new background, avoiding harsh lines or abrupt transitions.
To apply feathering, select the image and press Shift + F6. This opens the Feather Selection dialog box. Enter your desired feather value and press Enter to apply it.
Typically, a feather value between 0.3 and 0.4 produces good results.
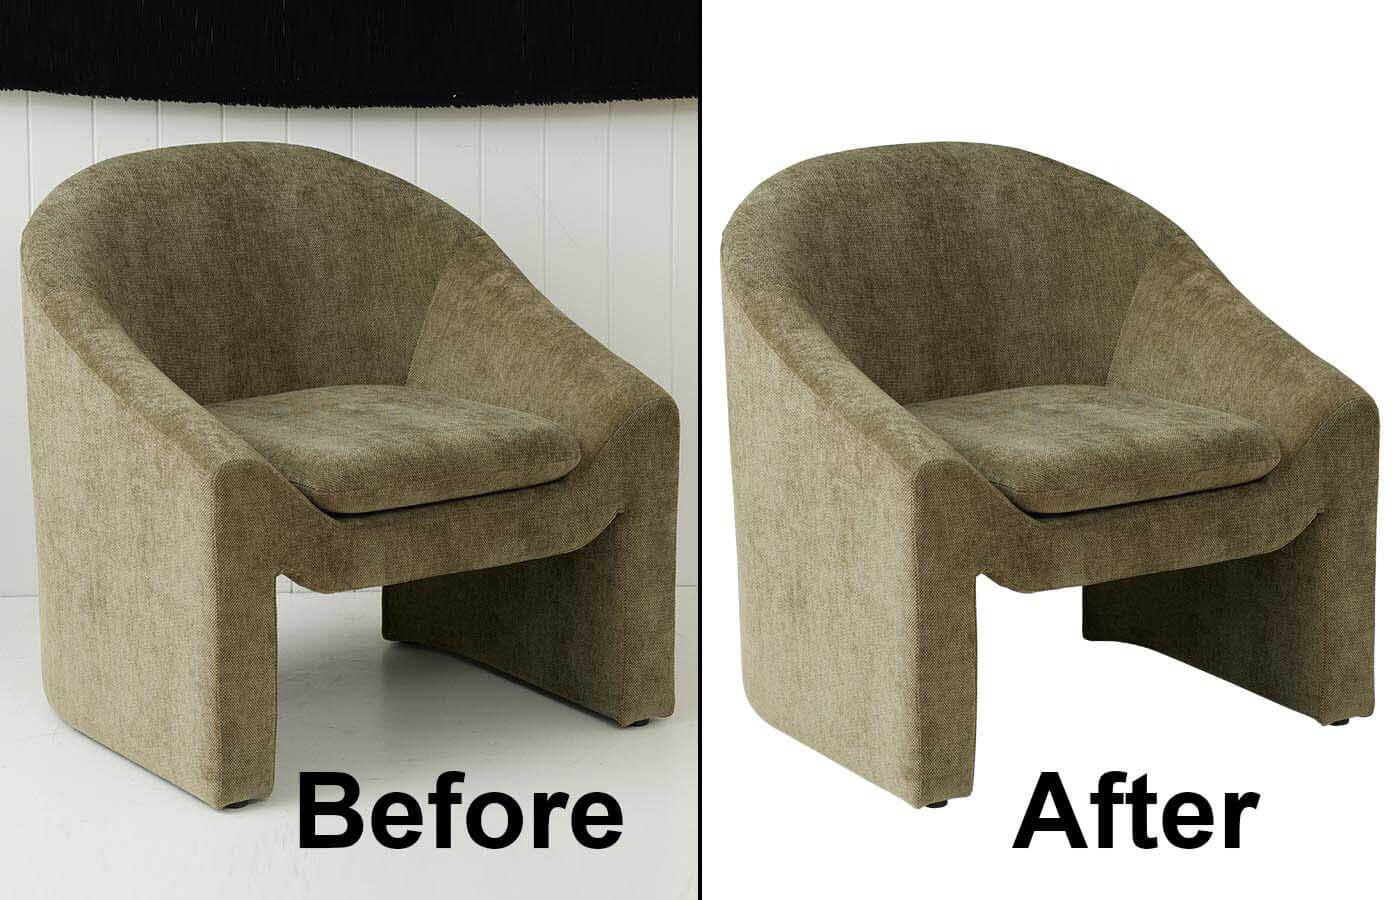
Removing the background and achieving the final goal
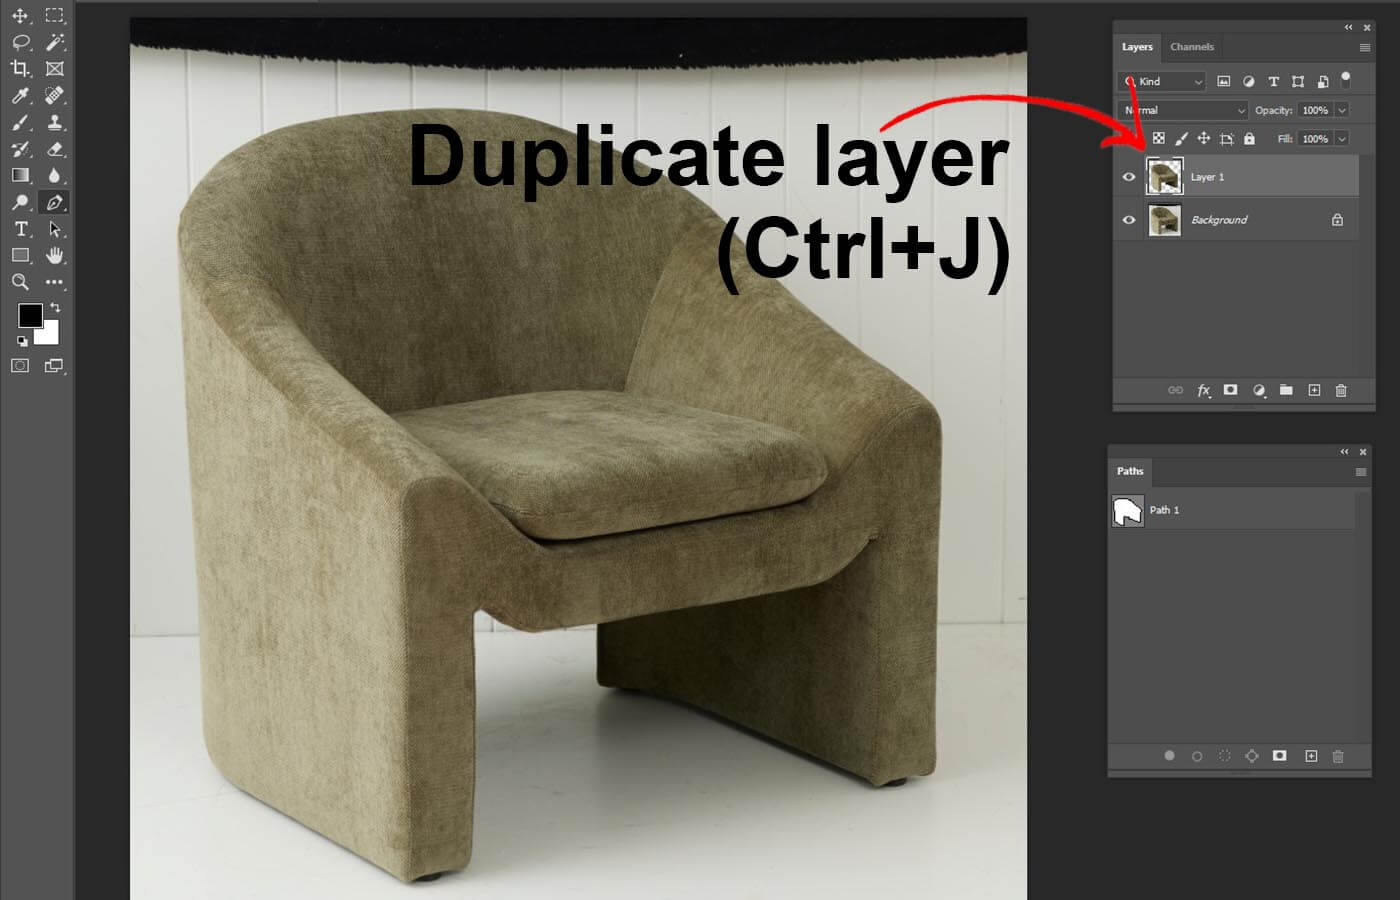
After feathering the selection properly, create a duplicate layer by pressing Ctrl+J while the image is selected. This will generate a new layer showing only the product, without any background. If you turn off the visibility (eye icon) of the original product layer in the Layers panel, only the foreground with a transparent background will remain visible.
If your goal is simply to remove the background and keep it transparent, then the task is complete. However, if you need a background of a different color, click ‘Create a new layer’ and place it between the two existing layers. Then, fill this new layer with the desired color to achieve the required background.
We trust that you have found the answer to your question: “How to use the Pen Tool in Photoshop to remove the background.” However, should you have any further inquiries regarding image background removal, please do not hesitate to reach out to us via our live chat. Our dedicated support team is available to assist you, free of charge.