How to use the lasso tool on photoshop
What is the Lasso Tool in Photoshop?
Before answering the question “How to use the Lasso Tool in Photoshop,” it’s important to first understand what the Lasso Tool is.
The Lasso Tool is a freehand selection tool used in Photoshop to isolate parts of an image so you can edit, move, or delete them independently. It’s especially useful for selecting irregular or organic shapes that can’t be easily captured with rectangular or elliptical selections.
Photoshop offers three types of Lasso Tools, each designed for different use cases:
| Tool Type | Description | Best For |
|---|---|---|
| Lasso Tool | Freehand drawing of selection | Organic or irregular shapes |
| Polygonal Lasso Tool | Click-to-point straight edges | Geometric or angular shapes |
| Magnetic Lasso Tool | Auto-snaps to image edges | Detailed object outlines (e.g., faces, objects with contrast) |
How to Use the Lasso Tool on Photoshop – Step-by-Step Guide
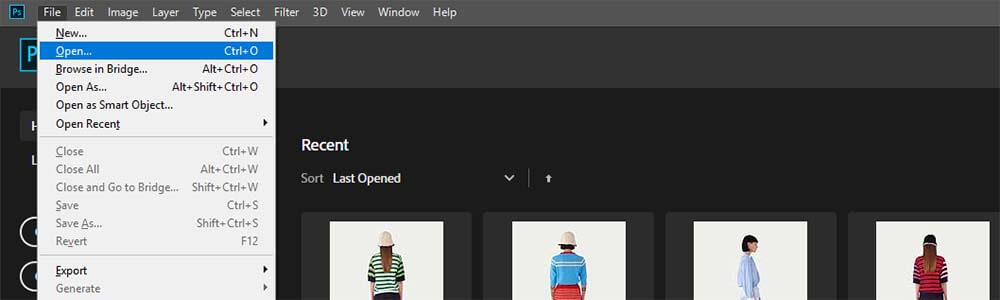
Step 1: Open Your Image in Photoshop
Launch Photoshop and open the image you want to edit.
Go to File > Open, then select your image file.
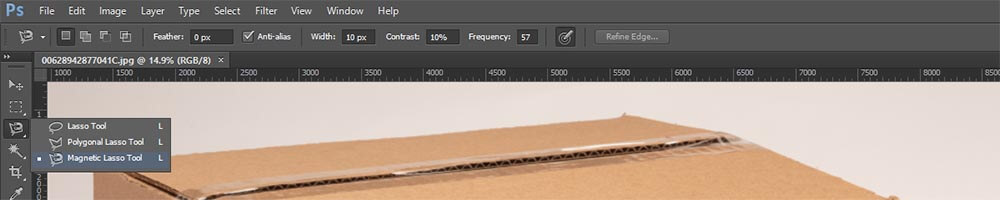
Step 2: Magnetic Lasso Settings (Found in Options Bar at the Top)
| Setting | Description | Tip |
|---|---|---|
| Width | How far from your cursor Photoshop looks for an edge (in pixels) | Lower = more precise |
| Contrast | How strong the color difference must be to detect an edge (0–100%) | 10–20% works well for average edges |
| Frequency | How often Photoshop places anchor points (1–100) | Higher = more points (better for complex shapes) |
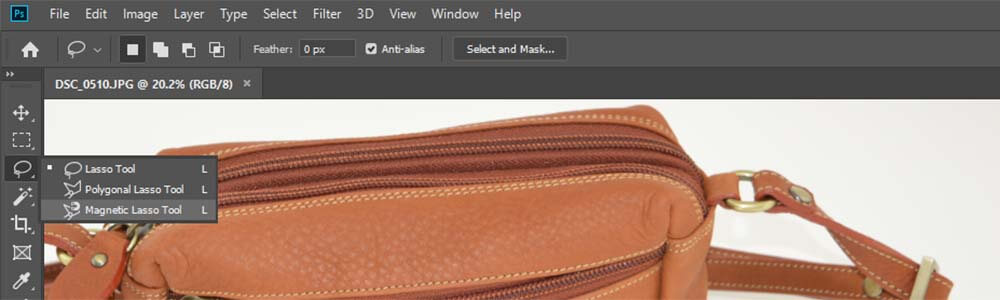
Step 3: Select the Lasso Tool
In the Toolbar (usually on the left), right-click on the Lasso Tool icon to reveal three types:
Lasso Tool (freehand selection)
Polygonal Lasso Tool (straight-edge segments)
Magnetic Lasso Tool (snaps to edges)
Shortcut: Press L, then cycle through tools with Shift + L until Magnetic Lasso is active.
Step 4: Magnetic Lasso Tool (Auto Edge Detection)
Click Once to Start
Move your mouse to the edge of the object you want to select.
Click once to place the starting anchor point—this is where the selection begins.
Move Along the Object’s Edge
Slowly drag your cursor around the edge of the object.
The Magnetic Lasso will automatically drop small anchor points when it detects contrast between the object and background.
- You do not need to click constantly—Photoshop is auto-snapping to what it thinks is the edge.
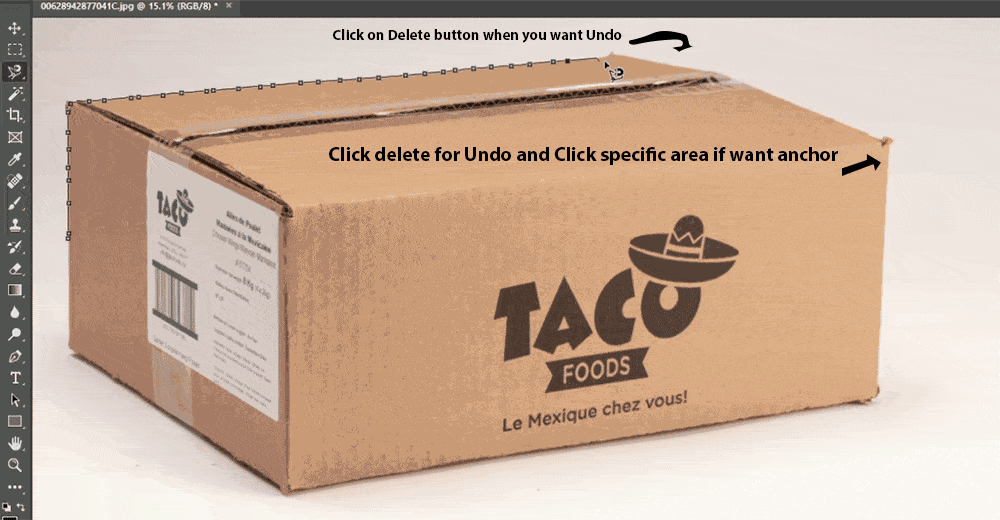
Step 5: Click Manually When Needed
If the automatic snapping misses a corner or detail, you can manually click to place an anchor point.
This gives you control over accuracy, especially around tight curves or sharp angles.
Step 6: Undo Last Anchor (Mistake Fix)
If the tool places a point in the wrong spot, press Delete (Windows) or Backspace (Mac) to remove the last anchor.
You can keep pressing it to remove multiple anchors if needed.
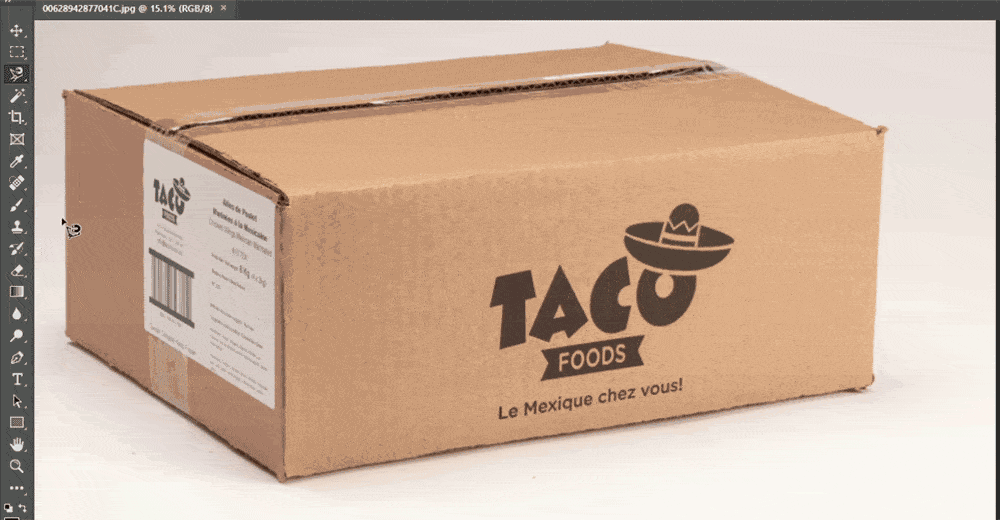
Step 7: Complete the Selection
To close the selection:
Either hover near the starting point (a small circle appears) and click to complete the loop.
Or simply double-click to auto-complete the selection.
Alternatively, press Enter/Return to finish.
Once completed, the selection becomes active with marching ants outlining the chosen area.
Step 8: Apply Feathering for Smooth Edges
- Press Shift + F6 to open the Feather Selection dialog box.
- Enter a feather value between 0.3 and 0.4 pixels and click OK.
Note: Feathering helps blend a small pixel area between the background and foreground, resulting in a smoother and more natural edge.

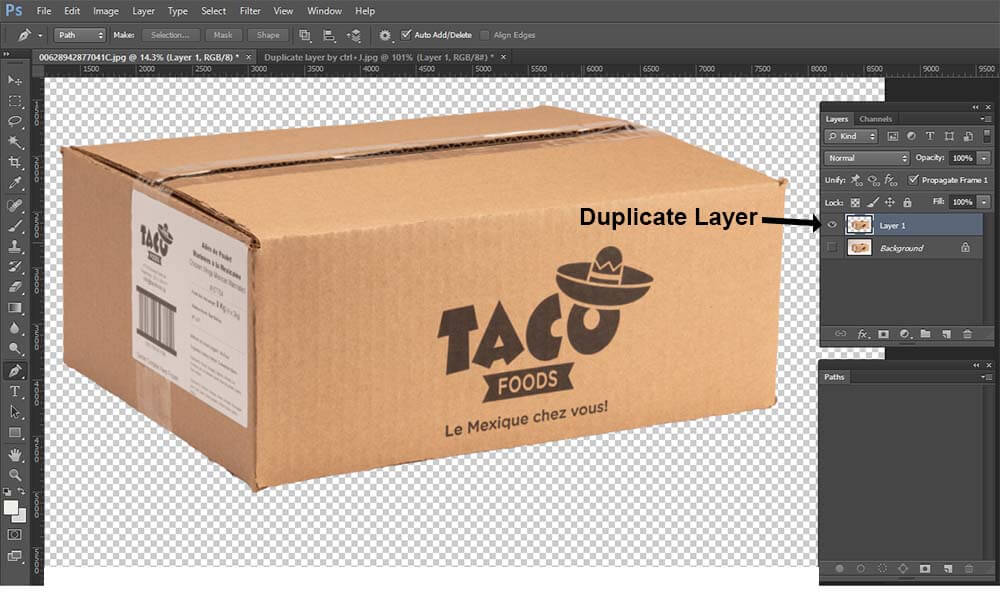
Step 9: Isolate the Foreground
- With the selection still active, press Ctrl + J.
- This will create a duplicate layer containing only the foreground object, with a transparent background.
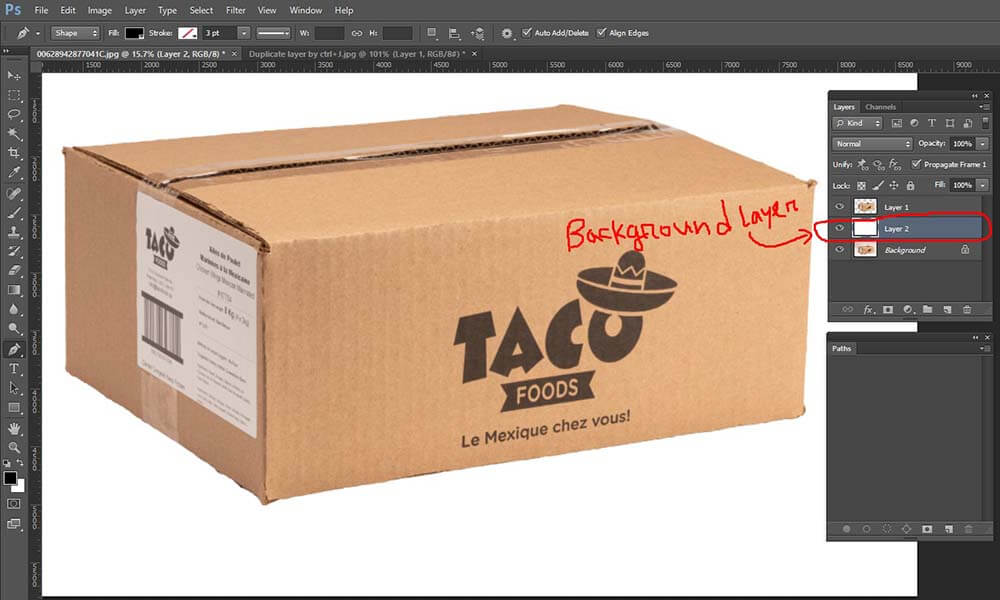
Step 10: Apply the Background Layer with required color
- Insert a new blank layer between the original image layer and the isolated foreground layer.
- Press D to reset the foreground/background colors to Photoshop’s default (black and white).
- To fill the layer with:
- White, press Ctrl + Backspace
- Black, press Alt + Backspace
- White, press Ctrl + Backspace
Tip: If a custom color is needed, click the color picker in the toolbar, choose the desired color, and apply it using the same shortcut method.
Once the color is applied to the blank layer, the composition with the new background and the clipped foreground will be complete.
- Insert a new blank layer between the original image layer and the isolated foreground layer.
Finally, we are doing background removal using the Magnetic Lasso Tool, and we hope you have now received the answer to your question: “How to use the Lasso Tool on Photoshop.”
However, if you still have any questions about “How to use the Lasso Tool on Photoshop,” feel free to chat live with our team 24/7—free of cost.
Get the answer to your question as well: