How to Chroma Key in Photoshop (Remove Green Screen)
Short Summery:
Learn how to chroma key in Photoshop to remove green backgrounds and replace them with custom scenes using simple, non-destructive editing steps.
Before following the step-by-step guide on how to chroma key in Photoshop, it's important to first understand what chroma keying is and how it works.
Chroma keying is a visual effects technique used to remove a solid-colored background (usually green or blue) from an image or video. This allows you to replace that background with any scene, texture, or graphic of your choice.
The process works by identifying a specific color range (typically bright green, which is uncommon in skin tones or clothing) and making it transparent, so only the subject remains visible. In Adobe Photoshop, this is done through selection tools, masks, and layer adjustments.
Step-by-Step Instructions:
Step 1: Open Your Image
Launch Adobe Photoshop.
Open the image with a green screen background.
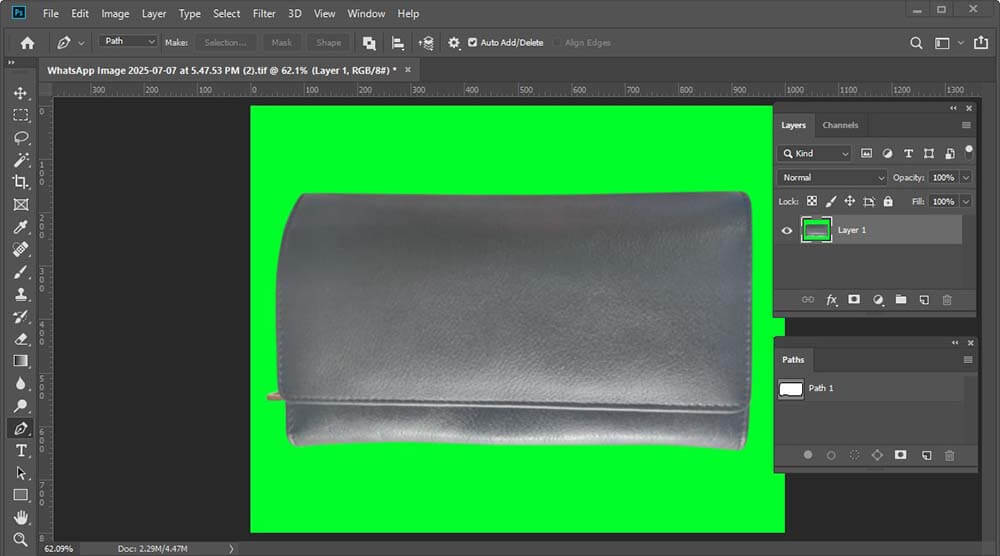
Step 2: Unlock the padlock icon
If the layer is locked, Click on the padlock icon to unlock it.
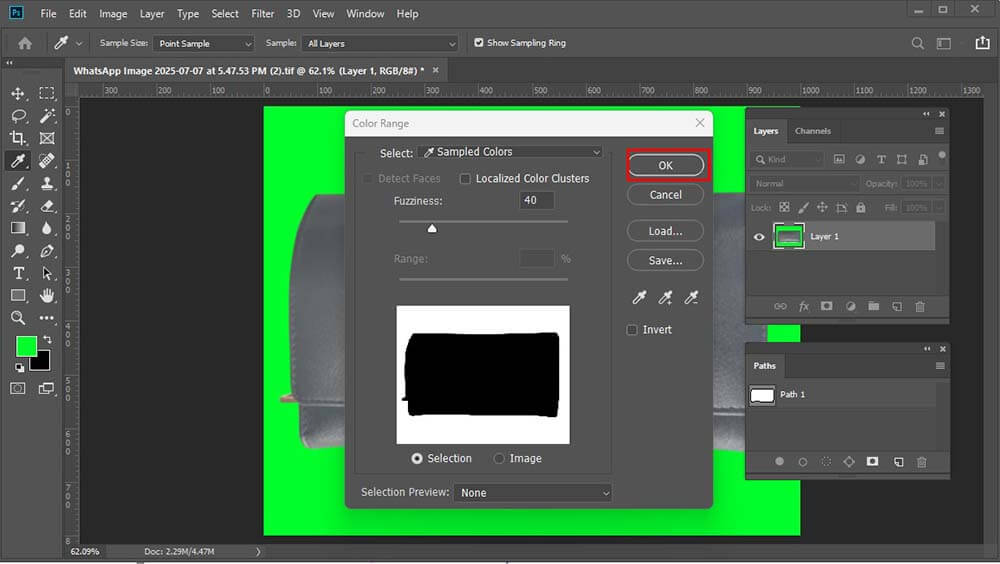
Step 3: Select the Green Background
Go to the Select menu > Color Range.
In the dialog box:
Use the Eyedropper Tool to click on the green background.
Adjust the Fuzziness slider to refine the selection.
Click OK to create the selection.
- Click OK to create the selection.
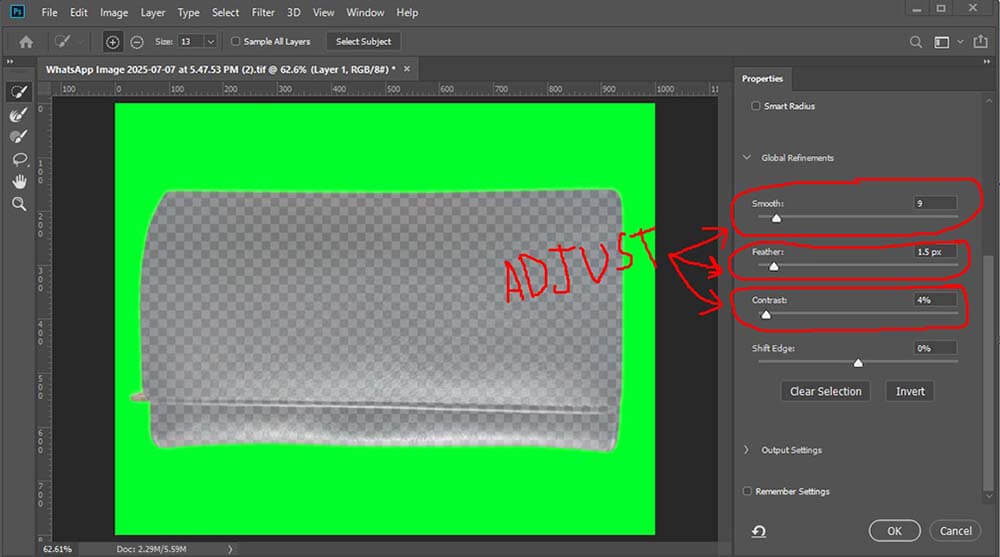
Step 4: Refine the Selection
Go to Select > Select and Mask.
Use the Refine Edge Brush Tool to smooth hair or detailed edges.
Adjust:
Smooth (to clean jagged edges)
Feather (for soft transitions)
Contrast and Shift Edge as needed.
Output to Layer Mask and click OK.
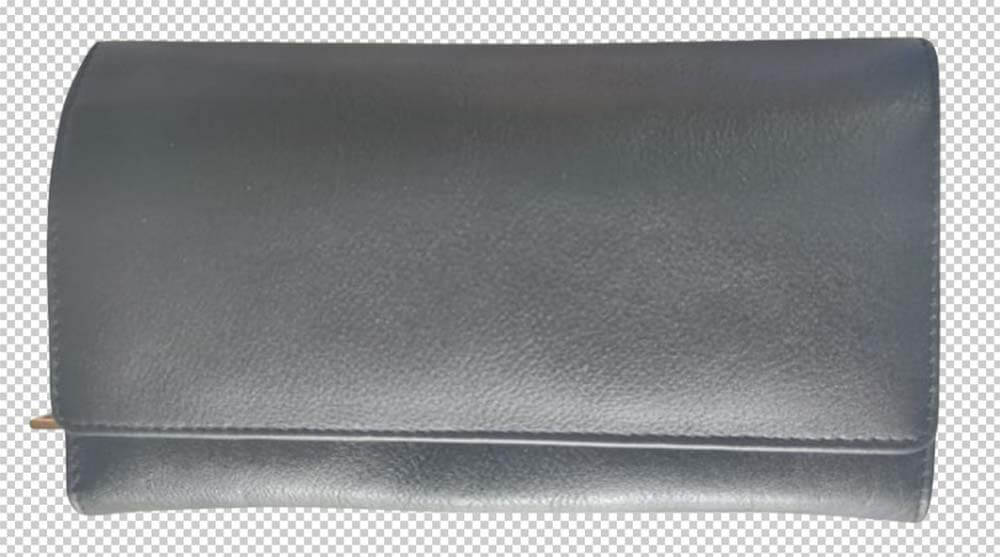
Step 5: Remove the green background
Remove the selected green background by clicking the Delete button.
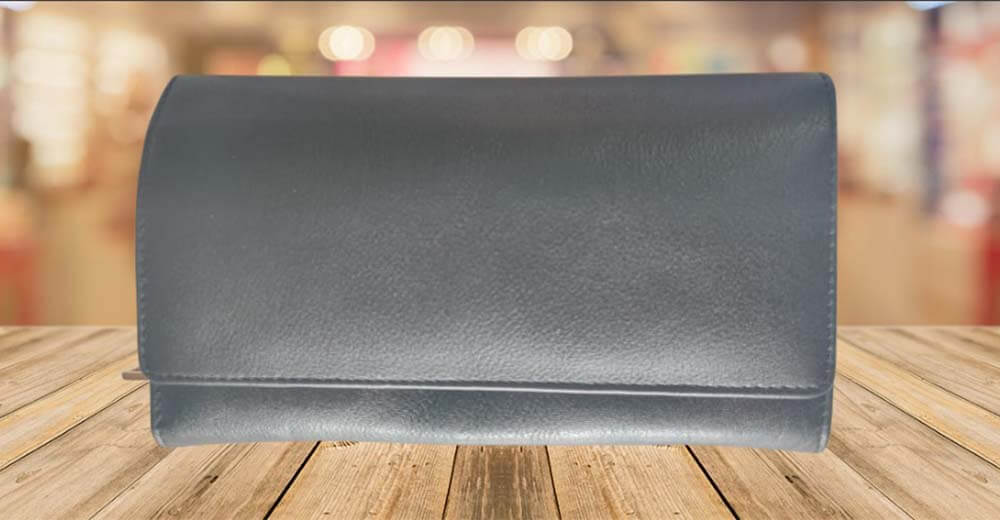
Step 6: Add a New Background
Drag and drop or place a new background layer below your subject.
Use Transform (Ctrl+T) to resize and position the new background as needed.
Pro Tips:
Avoid green spill on the subject by using Select > Modify > Expand before masking.
If green tones remain on edges, use Hue/Saturation adjustment with green channel selected and reduce saturation.
For hair or fine details, consider using Channels for advanced masking.
Additional guideline:
We hope you got the answer to your question, “How to chroma key in Photoshop,” from this article. Chroma keying is a powerful and creative technique that can take your photo editing skills to the next level. Whether you’re working on a portrait, a product shot, or a creative composite, removing and replacing a background accurately can make a huge difference in the final output.
However, if you’re looking for a more in-depth understanding of chroma keying—such as how to handle tricky edges, reduce green spill, or match lighting between subject and background—we offer detailed, step-by-step guides to help you master every part of the process. These tutorials are ideal for both beginners and advanced users who want to refine their technique and produce more professional results.
To explore these advanced topics or related Photoshop tools, simply use our search button to find the exact tutorial you need. Whether it’s chroma keying, masking, blending modes, or working with adjustment layers, our growing collection of tutorials is designed to support your learning journey. With practice and the right guidance, you’ll be able to confidently tackle any editing task in Photoshop.