How to make a drop shadow in photoshop
Before getting the answer to your question, “How to make a drop shadow in Photoshop,” it’s essential to first understand what a drop shadow is and how it works. A drop shadow is a visual effect used in graphic design, photo editing, and digital art to give depth and dimension to objects like text, shapes, and product images. It creates the illusion that the object is raised above the background by simulating a shadow that falls behind or beneath it, based on a light source.
This effect can make flat images appear more realistic and visually appealing. In product photography, for example, adding a drop shadow beneath a product can make it look like it’s resting naturally on a surface rather than floating in space. This helps the product stand out and look more polished and professional.
Drop shadows can be customized in Photoshop by adjusting settings such as opacity, distance, angle, spread, and size. These controls allow designers to create subtle or dramatic shadow effects depending on the desired style.
Understanding the purpose and function of a drop shadow will help you apply it more effectively in your designs. Once you grasp this concept, you’re ready to learn how to create a drop shadow using Photoshop tools.

Step 1: Open the Product Image
Begin by launching Adobe Photoshop and opening the image file (File > Open). Ensure the image is of high resolution for optimal editing quality.
Step 2: Ensure the Product Is Isolated from the Background
If the product image has a background (e.g., white, colored, or textured), it must be removed to create a clean and non-distracting composition for applying a realistic drop shadow.
2.1: Removing the Background Using the Pen Tool.
Accessible via the toolbar or by pressing P.
Ideal for products with complex or curved edges requiring precision.
Create anchor points around the object to form a path, then convert it to a selection.
Apply feather and create a duplicate layer using Ctrl+J.
Create a new layer between two existing layers and apply the required color.
For a step-by-step guide on removing the background using the Pen Tool, please check our article ‘How to Use the Pen Tool in Photoshop to Delete Background‘.
2.2: Removing the Background Using the Magnetic Lasso Tool.
Select the Magnetic Lasso Tool from the toolbar (nested under the Lasso Tool, or press L repeatedly).
Click on the edge of the object and move your cursor slowly along its border to let Photoshop snap points automatically.
Complete the selection by clicking the starting point or pressing Enter to close the loop.
Refine the selection using Select and Mask, or apply feathering for smoother edges.
Press Delete or add a layer mask to remove or hide the background cleanly.
Create a new layer behind the masked layers and apply the required color.
For a step-by-step guide on removing the background using the Lasso Tool, please check our article ‘How to Use the Lasso Tool in Photoshop to Delete Background‘.
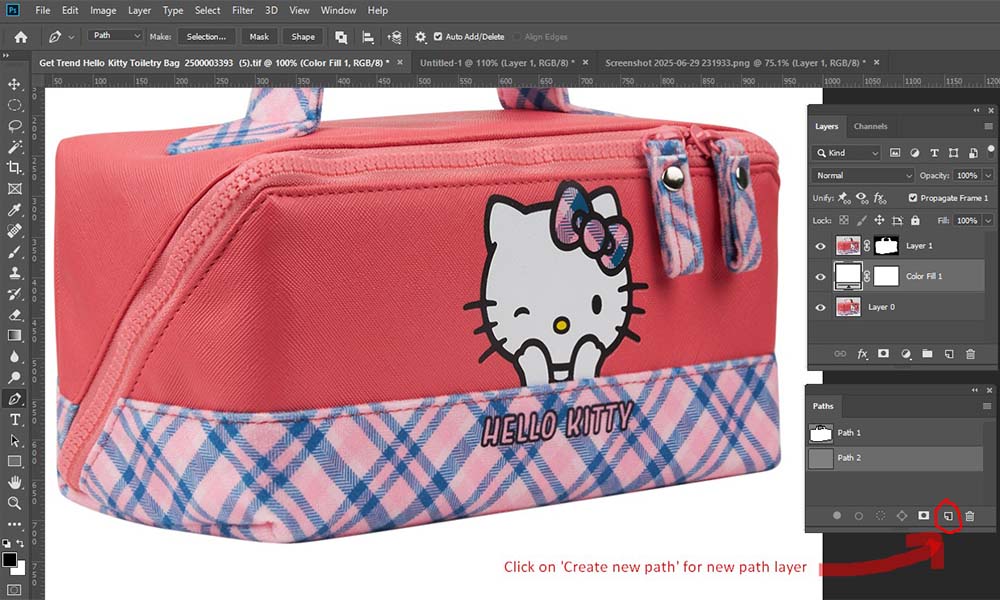
Step 3: Create a new path layer for shadow creation
After completing the background removal, create a new path layer named ‘path-02’ in the Paths panel to outline the targeted area for shadow creation.
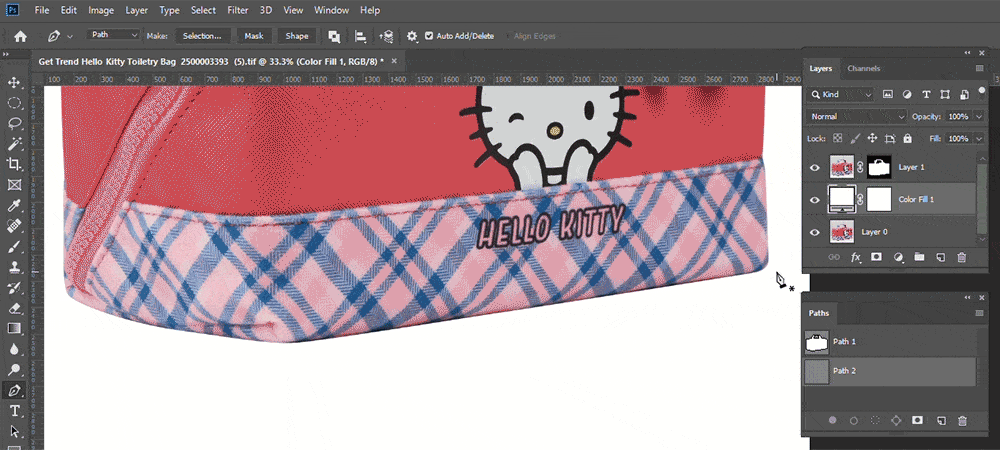
Step 4: Draw a path in the targeted shadow area
Draw a clipping path around the whole area where you want to add the shadow.
Make sure the path clearly shows the part where the shadow should go.
Step 5: Selection and feathering applied to path 2
Make sure Path-2 is active in the Paths Panel.
Press
Ctrl + Enter(Windows) orCmd + Return(Mac) to convert the path into a selection.Then press
Shift + F6to open the Feather Selection dialog box.Use a high feather value, such as 10, 20, 30, or even 200. Keep in mind that the appropriate value will vary depending on the image size.
Feathering softens the edge of the selection smoothly, ensuring a smoother transition between the foreground and the shadow for a more natural look.
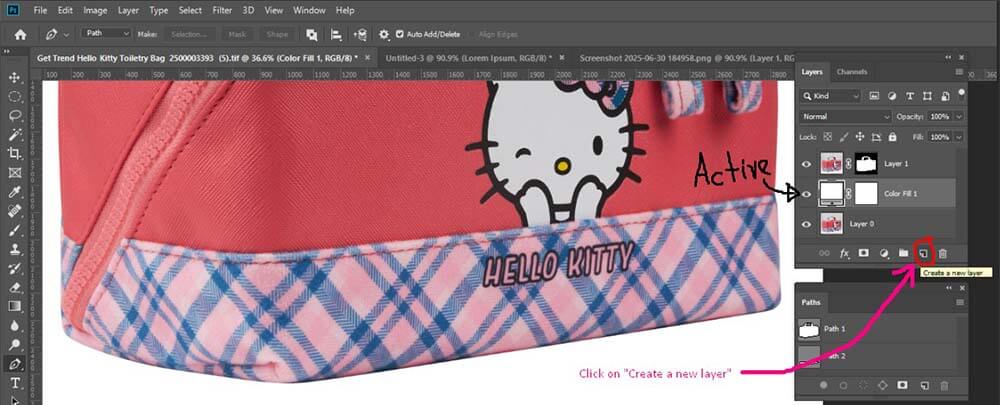
Step 6: Create a new blank layer to add the shadow
In the Layers Panel, select the background layer or the layer just below the duplicate.
Click on the “Create a New Layer” icon at the bottom of the Layers Panel.
A new blank (transparent) layer will appear above the selected layer.
Rename the new layer (e.g., “Shadow”) to keep your workflow organized.
This new layer will be used to apply and adjust the custom shadow independently of the original image.
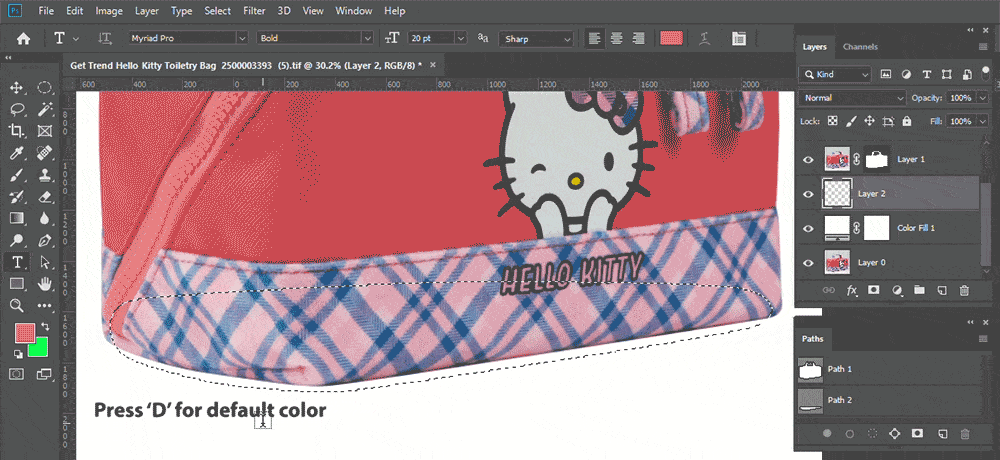
Step 7: Set the default color and apply the shadow
Press
'D'on your keyboard to reset the foreground color to black and the background color to white—the standard Photoshop default.Make sure the shadow layer is selected in the Layers Panel.
With your desired selection active (e.g., shadow area), press:
Alt + Backspace(Windows) orOption + Delete(Mac) to fill the selection with the foreground color (black).
This fills the selected area with black on the shadow layer, creating the base of your shadow.
Step 8: Adjust your shadow by increasing or decreasing the opacity and fill.
To refine the appearance of your shadow in Photoshop, you can adjust its opacity and fill values. This allows you to control how strong or soft the shadow appears against the background.
Steps:
Select the shadow layer in the Layers panel.
Locate the Opacity option at the top of the Layers panel.
Decrease it to make the shadow lighter and more subtle.
Increase it to make the shadow darker and more prominent.
Adjust the Fill value if you’re using layer styles (e.g., Drop Shadow).
Lowering Fill while keeping effects intact can help isolate only the shadow effect.
Experiment with both settings until the shadow blends naturally with the image.
🔎 Tip: Use Preview mode or toggle the layer visibility on and off to compare before and after adjustments.
