How to use the clone stamp tool on photoshop?
Short Summery:
Learn how to use the Clone Stamp Tool on Photoshop to remove imperfections, duplicate objects, and retouch photos easily with this step-by-step guide.
Before learning how to use the Clone Stamp Tool on Photoshop, it’s important to understand what it is and how it works.
The Clone Stamp Tool in Adobe Photoshop helps copy one part of an image to another area. It is useful for fixing mistakes, removing objects, or repairing old photos. Many people use it in photography, art, and design.
To get good results, it is important to adjust the brush size, hardness, and opacity. These settings help make the changes look natural. With practice, anyone can learn to use the Clone Stamp Tool for clean and smooth edits.

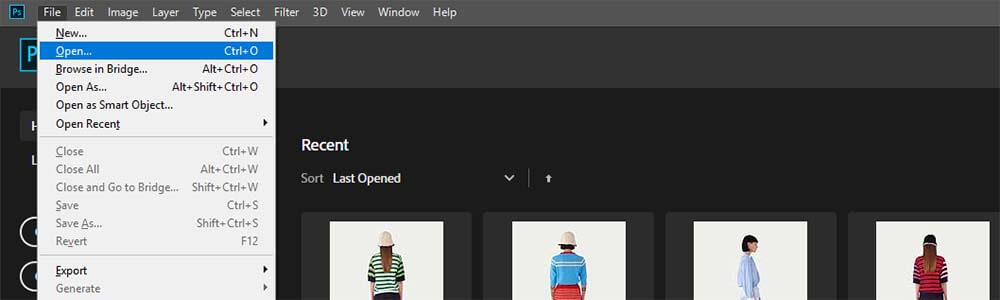
Step-01: Open the Image in Photoshop
- Begin by launching Adobe Photoshop and opening the image you wish to edit.
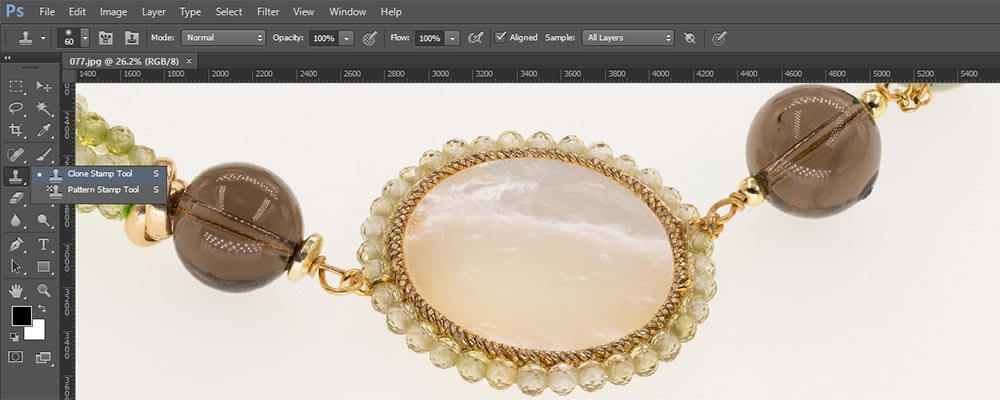
Step-02: Select the Clone Stamp Tool
- From the Tools panel on the left side of the screen, select the Clone Stamp Tool or press the shortcut key ‘S’ on your keyboard.
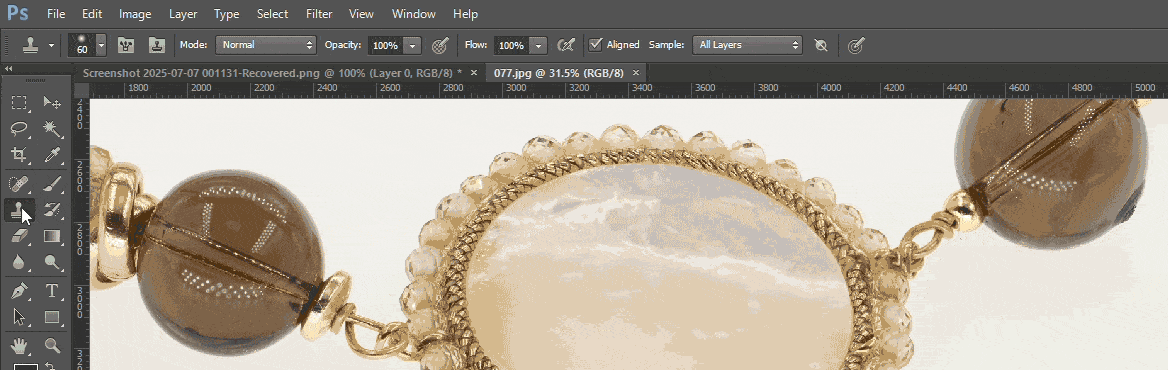
Step-03: Adjust the Brush Settings
Access the Top Options Bar
- Once the Clone Stamp Tool is selected, direct your attention to the top options bar. This area provides essential controls for customizing the tool’s behavior and precision.
Set Brush Size, Hardness, and Opacity
- Carefully adjust the brush size, hardness, and opacity to suit the specific editing task. A softer brush is recommended for smooth blending, such as skin retouching, while a harder brush is better for maintaining sharp edges, like architectural lines or patterns.
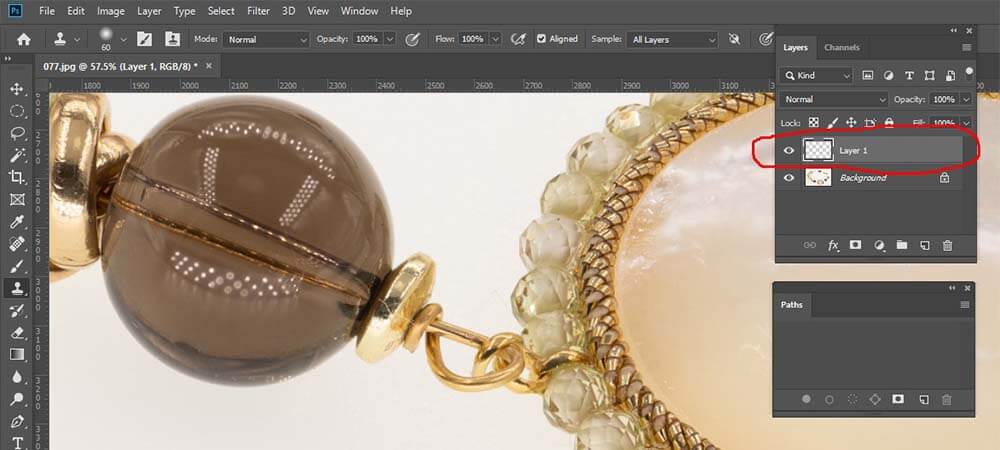
Select “All Layers” in Sample Dropdown
To ensure flexibility and non-destructive editing, select “All Layers” from the Sample dropdown in the options bar. This allows the Clone Stamp Tool to sample pixels from all visible layers, making it possible to work on a separate layer without altering the original image.

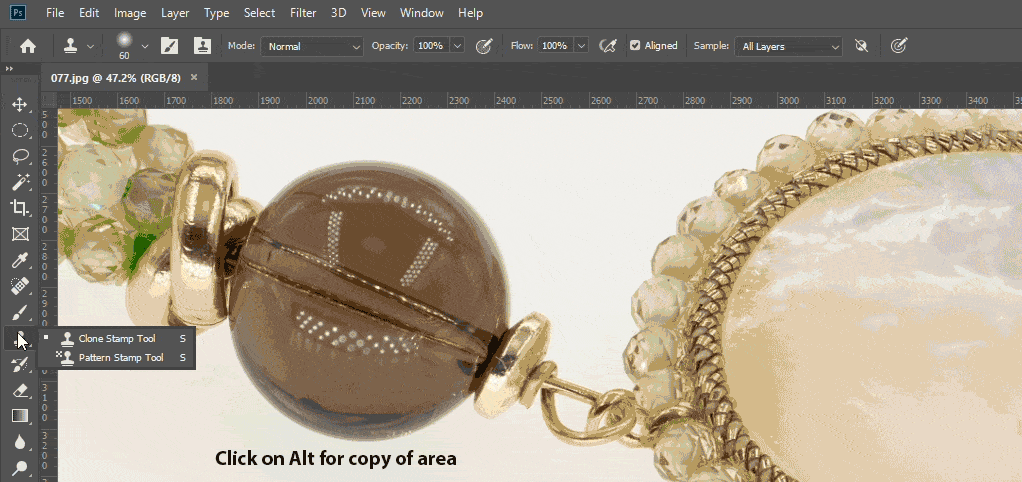
Step-04: Set the Sample Point
- Hold down the Alt key (Option key on Mac) and click on the area you want to sample (the source area). This defines the pixels that will be copied.
Step-05: Begin Cloning
- Move the cursor to the area where you want to apply the sampled pixels. Click and drag the mouse to paint over the target area. The sampled pixels will appear as you move the brush.
Step-06: Use Alignment Wisely Check or uncheck the ‘Aligned’ option in the top bar:
Aligned: Keeps sampling continuously from the source relative to your brush movement.
Unaligned: Always samples from the original source point.
Step-07: Zoom In for Precision
Use the Zoom Tool (Z) to closely inspect the area you are editing. Detailed work ensures seamless blending and reduces visible inconsistencies.
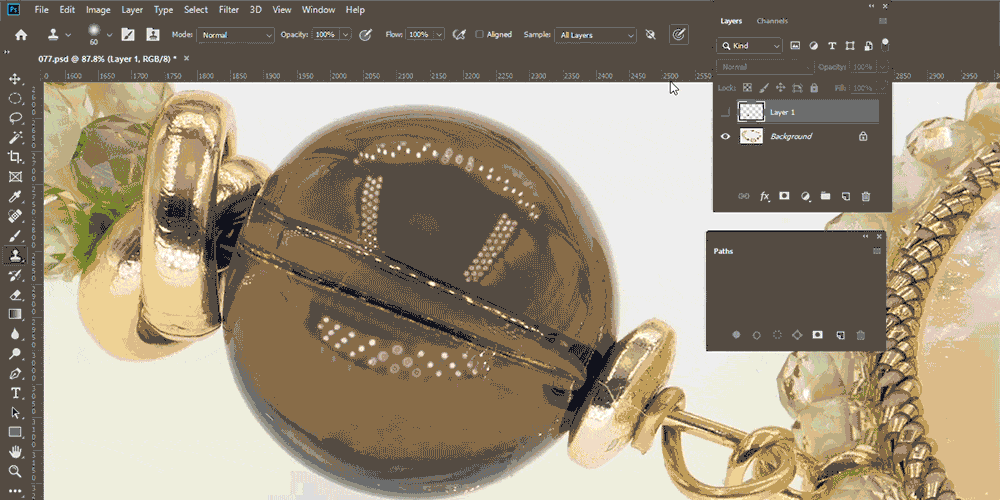
Step-08: Work on a New Layer (Optional Best Practice)
For non-destructive editing, create a new blank layer and in the options bar, set Sample: Current & Below. This allows you to clone without altering the original image directly.
Step-09: Blend and Refine
After cloning, adjust the cloned area using tools such as Eraser, Blur, or Smudge if needed, to ensure the edit looks natural and consistent with the surrounding image.
Step-10: Save Your Work
Once satisfied with the result, save the file in both PSD format (for future edits) and the desired export format (JPEG, PNG, etc.).
We hope this training has helped you understand how to use the Clone Stamp Tool on Photoshop.
If you would like to explore this tool in greater depth—such as advanced settings, best practices, or troubleshooting tips—please use the search function in our platform to find additional training materials and detailed guides.
Continuous practice and deeper learning will help you master this essential retouching tool.
Get the answer to your question as well: